
Purchase orders can be made on the BLAZE Retail Web app. Once accepted, the items in the PO restock the inventory in BLAZE.
This article will guide you through BLAZE's purchase order system when creating a PO to send to your vendor(s).
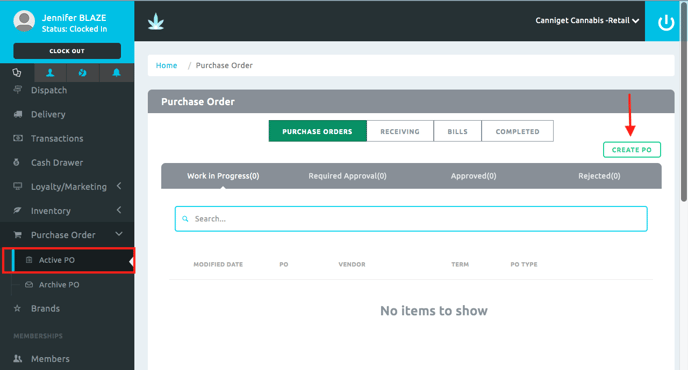
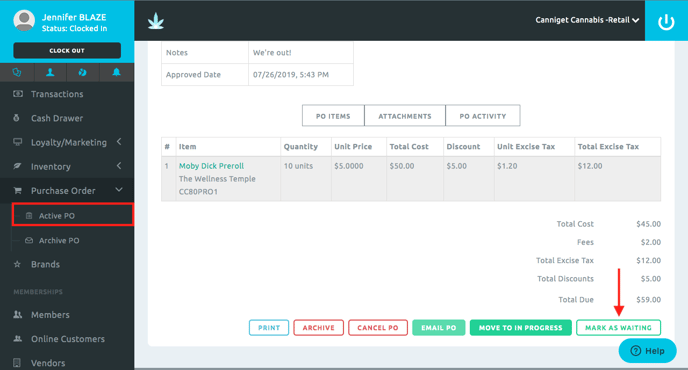
1. To make a purchase order, navigate to the "Purchase Order" section on the left and select "Active PO."
2. Once on the Active PO page, click on the green "Create PO" button.
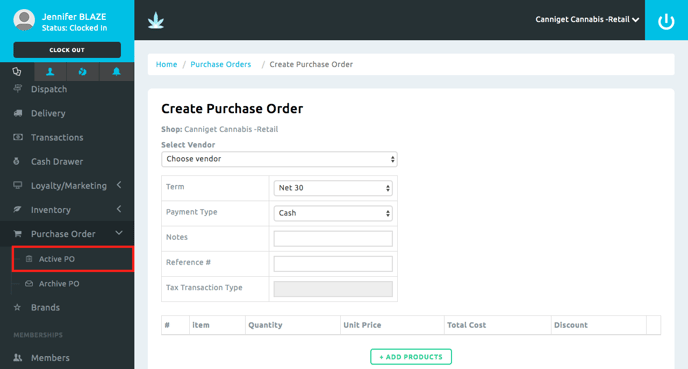
3. Select an active Vendor (NOTE: Vendors must be set up before making a PO).

4. Select the Terms for paying your vendor (Net 30, COD, Net 45, Net 60, Net 15, Net 7, or Custom).

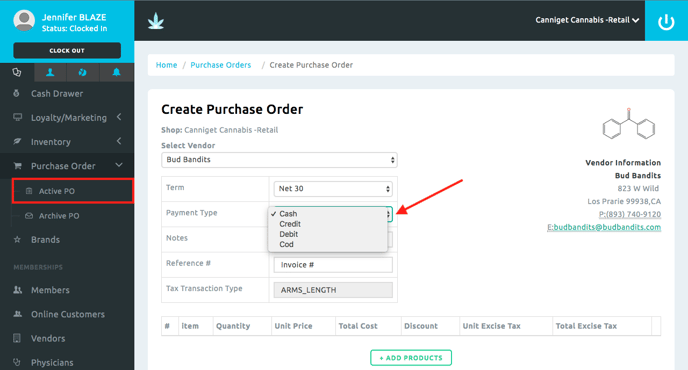
5. Select payment type (cash, credit, debit, cod).
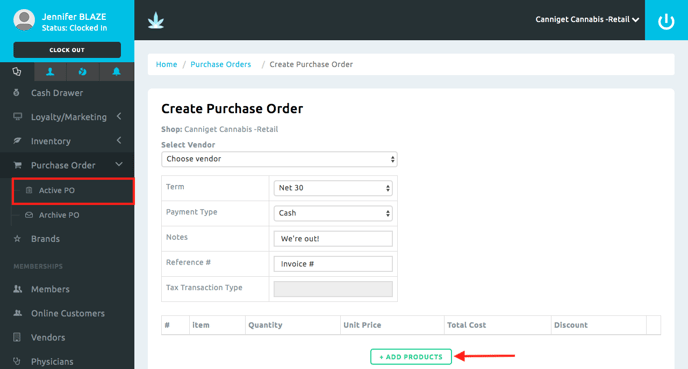
6. Add any notes about the order. These notes will appear on the emailed PO.
7. Add a reference #, this is similar to an invoice #.
8. Click the green "+ Add Products" button to select products from the selected vendor.
9. Enter the desired Quantity, Unit Price, and any Discounts for the ordered product (NOTE: the Total Cost automatically adjusts as the Quantity or Price are modified).
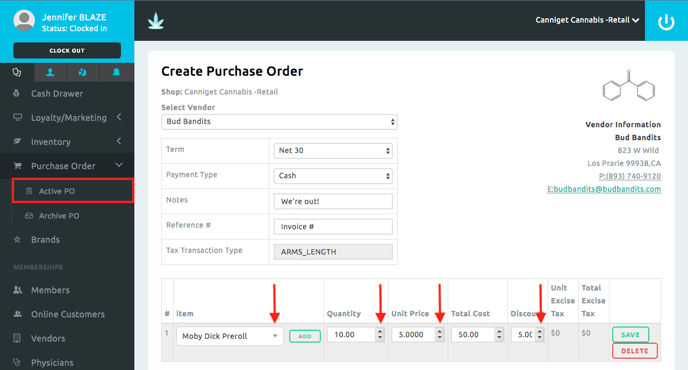
10. Click the green "Save" button (NOTE: the Unit and Total Excise Tax will adjust automatically).

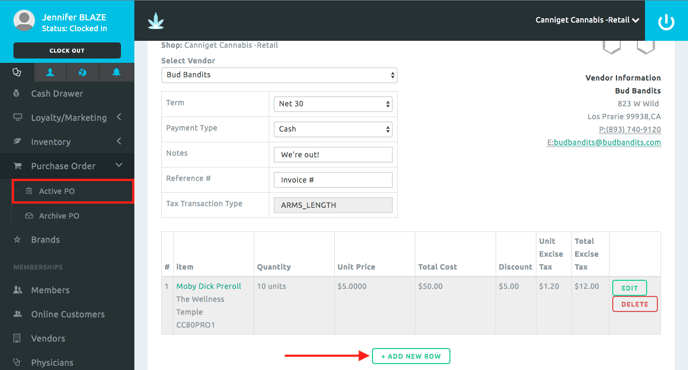
11. To edit, click the green "Edit" button. The PO can be edited up until the order has been received. Repeat step 10 to save any modifications.

12. To add more products to the PO, click the green "+ Add New Row" button to repeat steps 9 & 10.
13. Enter any fees, discounts, or predetermined adjustments.

14a. Click the green "Create" button to create a PO.
or
14b. Click the blue "Create & Submit for Approval" button to create a PO to be reviewed by an employee with ordering permissions granted.

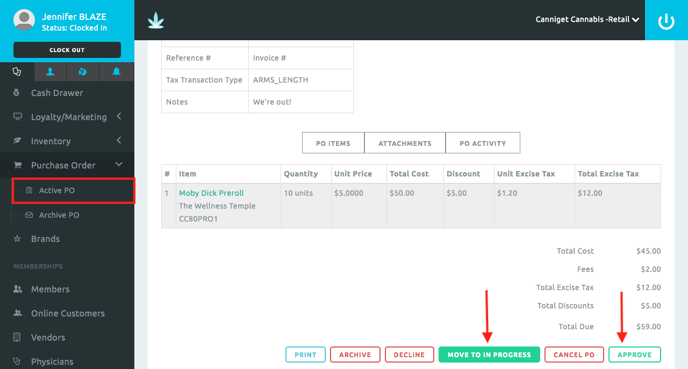
15. Select either the green "Move to in Progress" button to edit the PO, or the green "Approve" button to authorize the PO created by an employee and enter your pin (NOTE: if you selected the "Create & Submit for Approval" button, the green "Approve" button will not appear).
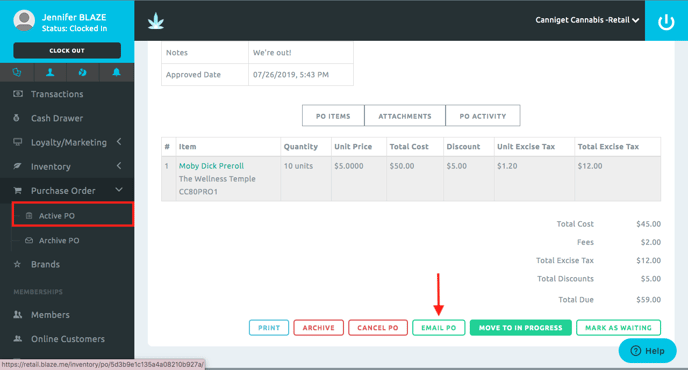
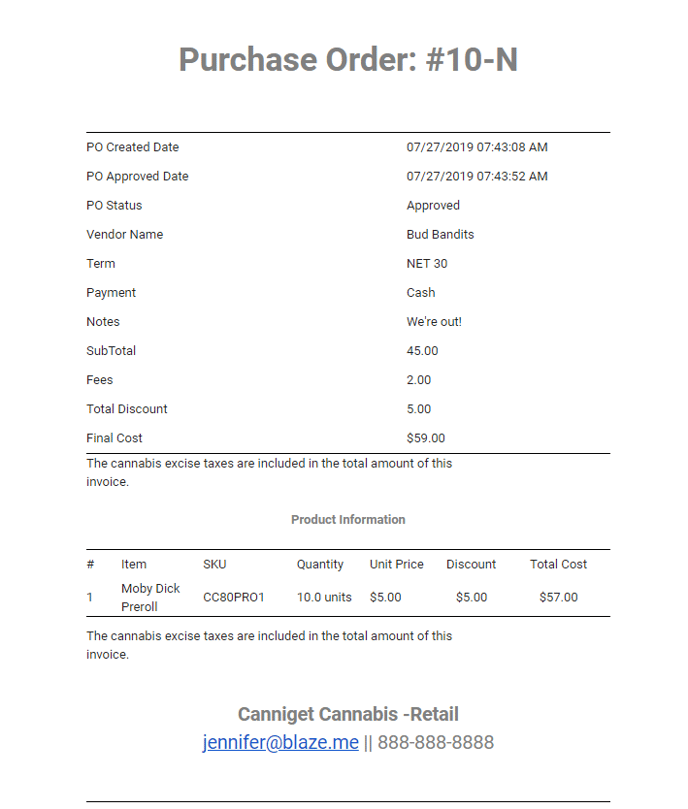
16. Select the green "Email PO" button to email the invoice. Enter the desired email when prompted.
Example Emailed PO:
17. Select the green "Mark as Waiting" button to progress the PO once the vendor confirms the order.
Please see the Receiving and Completing a PO article for further Purchase Order instructions.